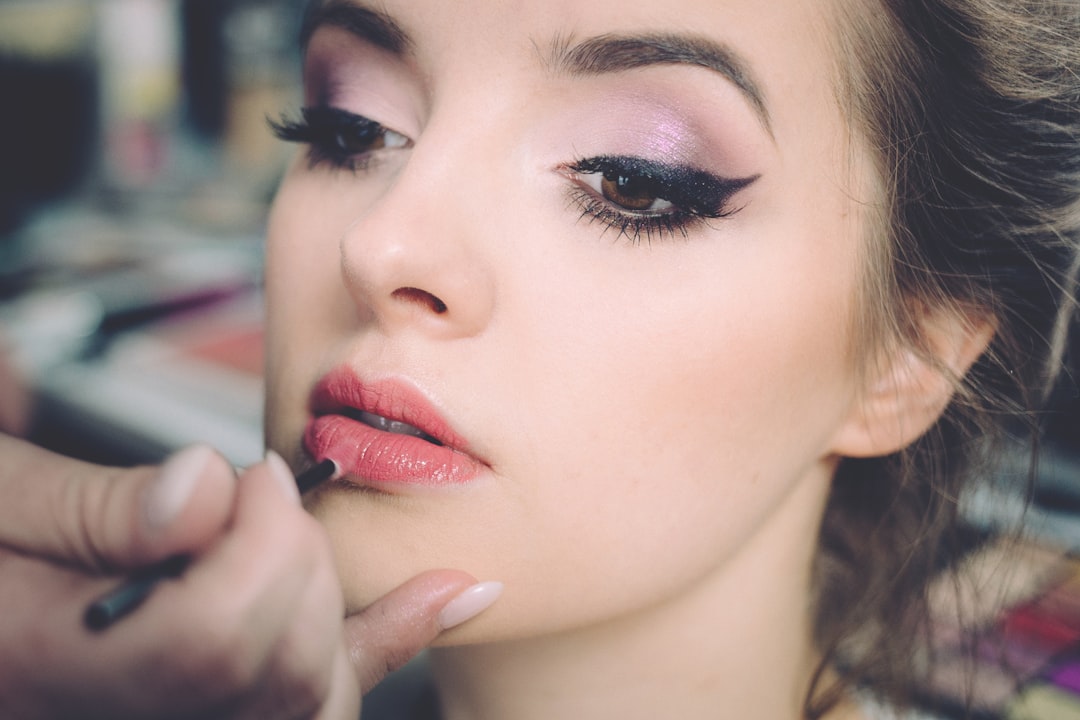
Smokey eye makeup has been a popular trend in the beauty world for decades. It is a versatile and timeless look that can be worn for any occasion, from a casual day out to a glamorous evening event. The history of smokey eye makeup dates back to ancient Egypt, where both men and women would use kohl to create a smudged and smoky effect around their eyes. This technique was not only used for cosmetic purposes but also believed to have protective and spiritual significance.
In modern times, smokey eye makeup gained popularity in the 1920s during the silent film era. Actresses like Clara Bow and Louise Brooks were known for their sultry and mysterious looks, often achieved with dark, smudged eye makeup. Since then, the smokey eye has become a staple in the beauty industry and is loved by celebrities, makeup artists, and everyday individuals alike.
The popularity of smokey eye makeup can be attributed to its ability to enhance and define the eyes. It adds depth and dimension to the eye area, making them appear larger and more captivating. The smudged effect also creates a sense of allure and mystery, making it an ideal choice for those who want to make a statement with their makeup. Additionally, smokey eye makeup can be customized to suit any eye shape, skin tone, or personal style, making it a versatile choice for everyone.
Understanding the Basics of Smokey Eye Makeup
A smokey eye makeup refers to a technique where eyeshadow is applied in a way that creates a gradient effect from dark to light, giving the illusion of smoke around the eyes. The key elements of a smokey eye are depth, blending, and intensity. The goal is to create a seamless transition between different shades of eyeshadow, resulting in a sultry and smoldering look.
There are different types of smokey eye makeup, each with its own unique style and intensity. The classic smokey eye is characterized by using shades of black, gray, or brown to create a smudged and smoky effect. This is the most versatile and universally flattering type of smokey eye and can be worn for any occasion.
Another popular variation is the colorful smokey eye, where vibrant shades like blue, purple, or green are used to create a bold and eye-catching look. This type of smokey eye is perfect for those who want to experiment with different colors and make a statement with their makeup.
When choosing the right smokey eye makeup for your eye shape, it’s important to consider the natural contours and features of your eyes. For example, those with hooded eyes may need to apply eyeshadow higher on the lid to create the illusion of depth, while those with deep-set eyes may need to focus on blending the eyeshadow upwards to avoid making the eyes appear sunken.
Choosing the Right Colors for Your Smokey Eye Look
Color theory plays a crucial role in creating a successful smokey eye look. The right choice of colors can enhance your natural features and complement your skin tone. When selecting eyeshadow shades for a smokey eye, it’s important to consider both the undertone of your skin and the color of your eyes.
For those with warm undertones, earthy shades like browns, bronzes, and golds work best. These colors will bring out the warmth in your complexion and create a harmonious look. On the other hand, those with cool undertones can opt for shades like grays, silvers, and purples, which will complement their skin tone and make their eyes pop.
When it comes to choosing colors for your smokey eye look based on your eye color, there are some general guidelines that can help you make the right choice. For blue eyes, warm shades like bronze, copper, and peach can create a striking contrast and make the eyes appear even bluer. Green eyes can be enhanced with shades of purple, plum, and taupe, while brown eyes can pull off almost any color but look particularly stunning with golds, bronzes, and deep blues.
Popular color combinations for smokey eye makeup include the classic black and gray combination, which is timeless and universally flattering. For a more dramatic look, you can experiment with jewel tones like emerald green and sapphire blue. If you prefer a softer and more romantic look, shades of rose gold and champagne can create a beautiful and ethereal effect.
Prepping Your Eyes for Smokey Eye Makeup
Before applying any eyeshadow, it’s important to prep your eyes to ensure that your smokey eye makeup lasts all day without creasing or smudging. The first step is to apply an eye primer to create a smooth and even base for your eyeshadow. Eye primer helps to prevent creasing, intensify the color payoff of your eyeshadow, and increase its longevity.
To prep your eyelids for smokey eye makeup, start by applying a thin layer of eye primer all over your lids. Use your ring finger or a flat brush to gently blend the primer into your skin until it is fully absorbed. This will create a smooth canvas for your eyeshadow and help it adhere better to your lids.
To prevent creasing and smudging throughout the day, it’s important to set your eye primer with a translucent powder or a skin-toned eyeshadow. This will help to absorb any excess oil on your lids and create a matte finish. Use a fluffy brush to lightly dust the powder or eyeshadow all over your lids before applying any eyeshadow.
Applying Eyeshadow for a Smokey Eye Effect
To achieve a smokey eye effect, it’s important to apply eyeshadow in a specific way that creates a seamless gradient from dark to light. Here is a step-by-step guide to applying eyeshadow for a smokey eye look:
1. Start by applying a transition shade to your crease. This should be a medium-toned shade that is slightly darker than your natural skin tone. Use a fluffy blending brush to sweep the eyeshadow back and forth in windshield wiper motions, focusing on the crease area.
2. Next, apply a darker shade to the outer corner of your eye. This can be a deep brown, black, or any other dark shade of your choice. Use a smaller blending brush to concentrate the color on the outer V of your eye, blending it into the crease.
3. To create depth and dimension, apply a slightly lighter shade to the center of your lid. This can be a shimmery or satin finish eyeshadow that will catch the light and make your eyes pop. Use a flat shader brush to pat the eyeshadow onto the center of your lid, blending it into the darker shade.
4. Finally, apply a light shade to the inner corner of your eye and brow bone to highlight and brighten the area. This can be a champagne or ivory shade that will add a touch of luminosity to your smokey eye look. Use a small brush or your finger to apply the highlight shade to the inner corner and brow bone.
When applying eyeshadow for a smokey eye effect, it’s important to blend and layer the colors to create a seamless transition between different shades. Use clean blending brushes to blend the colors together, focusing on the edges where they meet. This will help to create a soft and diffused look.
To create a gradient effect with eyeshadow, start by applying the darkest shade at the outer corner of your eye and gradually lighten the color as you move towards the inner corner. This will create a beautiful and seamless transition from dark to light, giving the illusion of smoke around the eyes.
Blending Techniques for a Seamless Smokey Eye Look
Blending is a crucial step in achieving a seamless smokey eye look. It helps to soften harsh lines, create a smooth transition between different shades, and achieve a professional finish. Here are some tips for blending eyeshadow for a flawless smokey eye:
1. Use clean blending brushes: It’s important to use clean brushes when blending eyeshadow to avoid muddying the colors. Clean your brushes regularly with brush cleaner or mild soap and water to remove any buildup of product.
2. Start with a light hand: When blending eyeshadow, start with a light hand and gradually build up the intensity. This will help you achieve a soft and diffused look without applying too much product at once.
3. Blend in circular motions: Use circular motions when blending eyeshadow to create a seamless transition between different shades. This will help to soften harsh lines and create a gradient effect.
4. Focus on the edges: Pay special attention to the edges where different shades meet. Use a clean blending brush to blend the colors together, ensuring that there are no harsh lines or visible transitions.
Different eye shapes require different blending techniques to achieve a seamless smokey eye look. For example, those with hooded eyes may need to blend their eyeshadow slightly higher on the lid to create the illusion of depth. On the other hand, those with deep-set eyes may need to focus on blending the eyeshadow upwards to avoid making the eyes appear sunken.
To achieve a flawless blend, it’s important to take your time and be patient. Blending is a skill that takes practice, so don’t be discouraged if it doesn’t come naturally at first. With time and practice, you will be able to achieve a seamless and professional-looking smokey eye.
Adding Definition with Eyeliner for Smokey Eyes
Eyeliner is an essential component of a smokey eye look as it helps to define and enhance the eyes. There are different types of eyeliner that can be used to achieve a smokey eye effect, including pencil, gel, and liquid.
Pencil eyeliner is the most beginner-friendly option as it is easy to control and can be smudged for a softer look. To apply pencil eyeliner for a smokey eye look, start by lining your upper lash line as close to the roots of your lashes as possible. Use short, feathery strokes to create a thin line, gradually building up the intensity if desired. Then, use a smudging brush or your finger to smudge the liner along the lash line, creating a smoky effect.
Gel eyeliner is another popular choice for a smokey eye look as it offers more precision and control than pencil eyeliner. To apply gel eyeliner, use an angled brush to pick up a small amount of product and start by lining your upper lash line. Use short, precise strokes to create a thin line, gradually building up the intensity if desired. Then, use a smudging brush or your finger to smudge the liner along the lash line, creating a smoky effect.
Liquid eyeliner is the most precise option for creating a winged eyeliner effect with a smokey eye look. To apply liquid eyeliner, start by lining your upper lash line as close to the roots of your lashes as possible. Use short, precise strokes to create a thin line, gradually building up the intensity if desired. Then, use the tip of the liquid eyeliner brush to create a wing at the outer corner of your eye. Connect the wing to the rest of the liner, creating a seamless and winged effect.
When applying eyeliner for a smokey eye look, it’s important to keep the line as close to the lash line as possible to create a seamless and natural-looking effect. Avoid creating a thick or heavy line, as this can overpower the rest of your eye makeup and make your eyes appear smaller.
Highlighting and Contouring for a Dramatic Smokey Eye
Highlighting and contouring are important steps in achieving a dramatic smokey eye look. They help to enhance the shape and structure of the eyes, create depth and dimension, and add a touch of luminosity to the overall look.
To highlight and contour for a smokey eye look, start by applying a matte or satin finish eyeshadow that is slightly lighter than your natural skin tone to the brow bone. Use a small brush or your finger to apply the highlight shade, focusing on the highest point of your brow bone. This will help to lift and define the arch of your brows, making your eyes appear more lifted and awake.
Next, apply a slightly darker shade to the outer corner of your eye and blend it into the crease. This will create depth and dimension, making your eyes appear more defined and sultry. Use a small blending brush to concentrate the contour shade on the outer V of your eye, blending it into the crease for a seamless transition.
When highlighting and contouring for a smokey eye look, it’s important to choose shades that are slightly darker or lighter than your natural skin tone. Avoid using shades that are too extreme or contrasting, as this can create an unnatural or unflattering effect.
To achieve a natural-looking highlight and contour, blend the shades together using clean blending brushes. Focus on the edges where they meet to ensure a seamless transition between different shades. This will help to create a professional and polished finish.
Mascara Tips to Complement Your Smokey Eye Look
Mascara is the final step in completing a smokey eye look. It helps to define and lengthen the lashes, making your eyes appear more open and captivating. When choosing the right mascara for your smokey eye look, it’s important to consider the desired effect and your personal preferences.
For a more natural look, opt for a lengthening mascara that will separate and define each lash without adding too much volume. This will create a soft and fluttery effect that complements the smokey eye without overpowering it.
If you prefer a more dramatic look, choose a volumizing mascara that will add thickness and fullness to your lashes. This will create a bold and intense effect that enhances the overall impact of your smokey eye makeup.
When applying mascara for a smokey eye look, start by curling your lashes with an eyelash curler to open up your eyes. Then, apply one or two coats of mascara to your upper and lower lashes, wiggling the wand from root to tip to ensure that each lash is coated evenly. If desired, you can also apply false lashes for added drama and intensity.
To prevent clumping and smudging throughout the day, it’s important to choose a mascara formula that is long-lasting and smudge-proof. Look for mascaras that are waterproof or have a long-wearing formula to ensure that your smokey eye makeup stays intact all day or night.
Fixing Mistakes and Perfecting Your Smokey Eye Makeup
Mist akes happen to everyone, especially when it comes to creating a smokey eye makeup look. Whether you’ve accidentally smudged your eyeliner or applied too much eyeshadow, there are ways to fix these mistakes and perfect your smokey eye. One common mistake is applying too much eyeshadow, which can make your eyes look heavy and overdone. To fix this, use a clean blending brush to soften the edges and blend out any excess product. Another mistake is smudging your eyeliner, which can create a messy and uneven look. To fix this, use a cotton swab dipped in makeup remover to gently clean up any smudges and then reapply the eyeliner for a crisp and defined line. Additionally, if you find that your smokey eye looks too dark or intense, you can use a clean blending brush to blend a lighter shade of eyeshadow over the top to soften the look. Remember, practice makes perfect, so don’t be discouraged if you make mistakes along the way. With time and patience, you’ll be able to master the art of the smokey eye.
If you’re looking to master the art of smokey eye makeup, you might also be interested in learning how to choose the right shampoo for healthy hair. Your hair is just as important as your makeup when it comes to overall beauty and confidence. In this informative article by Ephas, you’ll discover valuable tips and insights on selecting the perfect shampoo that suits your hair type and addresses specific concerns. From dry and damaged hair to oily scalps, this guide has got you covered. So why not take a moment to explore the world of hair care alongside your makeup routine? Check out the article here and elevate your beauty game to new heights.